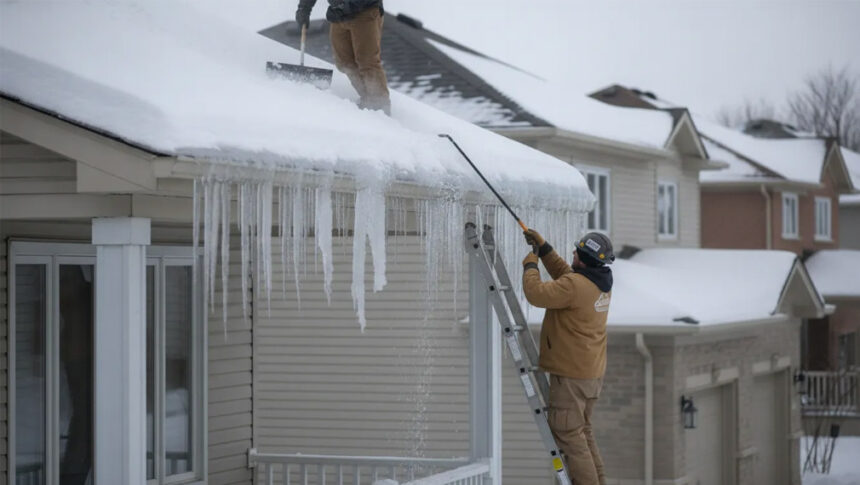
Connecticut roofs deal with a tough mix of nor’easters, freeze thaw cycles, coastal gusts, and leaf clogged gutters. Shingle brand alone will not determine how your roof holds up. What matters most are the details you cannot see once the shingles are installed: where the ice barrier starts and stops, how the drip edge is lapped, how valleys are built, the fastener pattern used, and whether attic ventilation is correctly balanced. If you are comparing residential roofing contractors, ask them to walk you through these specifics. The way they describe ice and water shield, flashing replacement, ridge vents, and nail placement will tell you as much as the number on their estimate.
-
Ice and Water Shield: Placement at Eaves, Valleys, and Low Slope Areas
In a cold climate state like Connecticut, ice dams form when heat escapes into the roof deck and melts snow, which then refreezes at the eaves. A self adhered ice and water shield protects the eaves from that backed up water. Ask the contractor exactly where they will run this membrane: along eaves, into valleys, around dormers, and over unheated porch roofs. Also ask how they sequence it with the drip edge at eaves and rakes so water sheds in the right direction. For a plain language sense of how complete systems fit together, compare the terminology you hear with the roofing solutions from Keith Gauvin Roofing and note which components are specified by name.
A common mistake is stopping the membrane too short of the interior warm wall, or skipping it in valleys and at eave to wall transitions where snow builds up. That can put water behind the fascia or into the sheathing. If you own a Cape with a low slope rear addition, ask whether they will use full coverage ice and water shield on that section or a low slope specific underlayment. Confirm they will seal around skylight curbs and install a gutter apron so meltwater cannot wick behind the gutter.
-
Balanced Attic Ventilation: Soffit Intake, Ridge Exhaust, and Baffles
Ventilation affects temperature across the roof deck and helps prevent ice dams from the inside out. Balanced airflow needs clear soffit intake and an exhaust path at the ridge. Ask how the crew will keep soffit vents open with insulation baffles and how they will size the ridge vent relative to intake. Also confirm that bathroom and dryer vents terminate outdoors with dedicated ducting and a proper roof cap, not into the attic where steam creates condensation and frost.
Consider a 1950s Cape with knee walls and blocked soffits: snow melts above the heated rooms, refreezes at the unheated eaves, and forms an ice dam. The fix is specific, not generic. Cutting in continuous soffit vents, adding rigid or foam baffles to maintain an air channel, air sealing attic bypasses around can lights and chimneys, and installing a ridge vent are coordinated steps. Power fans can cool an attic, but they can depressurize the space and pull conditioned air from the house if intake is inadequate. Your contractor should explain when a passive ridge and soffit system is preferable and how they will keep wind blown snow from entering under the ridge cap.
-
Coastal Wind Defense: Starter Strips, Fasteners, and Shingle Selection
Along the Sound, wind uplift pries at the roof edges first. Proper starter strips with factory adhesive at both eaves and rakes help lock perimeter shingles. Many manufacturers require a six nail pattern for higher wind ratings, with nails placed in the reinforced nailing zone, not high above the seal strip. Verify the nail type, length, and corrosion resistance, and ask whether the crew will hand seal shingles in cold weather so the adhesive bonds despite low temperatures.
Here is a realistic scenario: a coastal ranch loses tabs after a nor’easter because the previous roof used a four nail pattern, no starter at the rakes, and smooth shank nails. The remedy includes architectural shingles with a stronger laminate, a six nail pattern, ring shank nails where specified, and cap fastened synthetic underlayment to resist uplift before shingles go on. Overhangs should be trimmed to manufacturer guidance so wind cannot get under the shingle edge, and the crew should align hip and ridge caps with the prevailing wind direction.
-
Flashing and Penetrations: Chimneys, Step Flashing, and Pipe Boots
Most leaks start where shingles meet something else. Insist on new step flashing along sidewalls and dormers rather than reusing old metal. Counterflashing at chimneys should be cut into the mortar joint, not surface caulked; wide chimneys benefit from a small cricket to split the snow load and flow. Ask whether pipe boots will have UV resistant collars or metal flashings with neoprene seals, and whether skylights will get manufacturer specific flashing kits. Kickout flashing at roof to wall transitions diverts water into the gutter instead of behind the siding. On tear offs, plan for siding work if needed to expose and replace hidden step flashing; shortcuts here often show up as stains on the ceiling the first winter.
Valleys and Underlayment Choices: Woven, Closed Cut, or Open Metal
Valleys collect the most water and snow. Woven shingle valleys can be durable but are bulky and can trap debris. Closed cut valleys offer a cleaner look but rely on a straight cut and properly lapped underlayment. Open metal valleys with a W shaped center rib shed water quickly and are often favored where heavy runoff meets freeze thaw cycles. Ask which style they recommend for your roof pitch and exposure, and confirm that ice and water shield will fully line every valley beneath the finish layer.
Underlayment matters under every square. Traditional felt is familiar but tears easily in wind; synthetics resist tearing and often allow safer footing. On lower slopes, manufacturers may require double coverage or a self adhered underlayment. If a section is too low for shingles, your contractor should propose a different membrane roof system for that area. Trade offs are real: for example, an open metal valley may add cost but can extend service life in spots that see concentrated meltwater from upper roofs.
Before you sign, ask for a written scope that spells out the membrane locations, drip edge sequencing, valley style, fastener pattern, ventilation changes, and which flashings will be replaced. Request in progress photos of the roof deck, new step flashing before siding goes back, and the ridge vent installation. Plan ahead for timing so shingles can seal properly, and keep gutters clear before the first hard freeze to reduce ice dam risk at the eaves. After major storms, a quick roof check for lifted shingles, loose ridge caps, and cracked pipe boots helps spot small issues before they become ceiling stains.