Two striking images do not automatically make a convincing video. A product photograph and a polished closing shot may look excellent separately, yet leave an unclear journey between them. What moves? Where does the camera travel? Which details should remain unchanged?
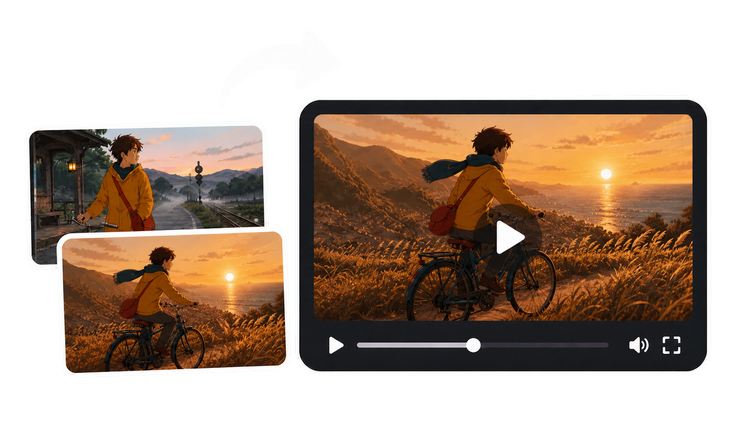
A first and last frame AI video generator gives that journey two visual anchors. The opening image establishes the scene, while the ending image guides its destination. The creative work lies in making the relationship between those images understandable.
Better preparation starts with treating the two frames as moments within a shot. Composition, movement, and continuity deserve as much attention as the appearance of either image.
Give the Ending a Clear Purpose
Choose the final frame around what the viewer should understand when the video finishes. For a product reveal, that might be the complete object in a readable composition. For a room transformation, it might be the finished interior with its layout clearly visible.
This decision helps determine what belongs in the opening frame. A close view of a product detail can lead toward a wider reveal. An unfinished room can lead toward the same space after decoration. In each case, the ending resolves an idea introduced at the beginning.
Keep the Main Subject Recognizable
When the same person or object appears in both images, compare the features that establish identity. Clothing, proportions, colors, and distinctive shapes should agree unless changing them is the purpose of the transition.
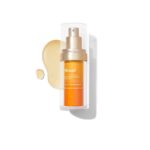
For example, a bottle with different cap shapes in the two frames introduces an additional transformation. If the intended movement is only a camera push, that mismatch works against the brief.
Before uploading, place the images side by side. Identify every visible difference and decide whether it is intentional. Correcting an accidental mismatch makes the requested transition more specific.
Make Framing Support the Movement
A first and last frame AI video generator receives the endpoints, but the motion between them still needs direction. The relationship between subject size, camera angle, and background structure provides a useful starting point.
If the subject appears larger in the ending image, a gradual camera approach may fit the composition. If the viewpoint shifts sideways, a restrained lateral move may be more appropriate.
Avoid asking for a locked camera when the images imply a substantial change in viewpoint. The prompt and the keyframes should describe compatible versions of the same shot.
Choose One Dominant Change
A short transition becomes difficult to evaluate when everything changes at once. A turning character, moving camera, changing outfit, and transforming background create several competing events.
Choose the change that carries the story. A product reveal might prioritize camera movement. A day-to-night scene might prioritize lighting. A before-and-after interior might prioritize the transformation of furniture and finishes.
Other movement can remain secondary. This gives you a clear standard for reviewing the output: did the main event remain readable throughout the clip?
Handle Lighting as Part of Continuity
Lighting differences should have a reason. If the opening image has soft daylight and the ending image has strong colored illumination, decide whether that shift belongs to the story.
For a day-to-night transition, describe the environmental change explicitly. For a straightforward product shot, consider preparing frames with more consistent illumination.
Pay attention to reflections as well as brightness. A glossy surface can look substantially different when its reflected surroundings change. Inspect those areas during review, especially when the product’s material and shape matter to the final presentation.
Use the Prompt to Describe the Journey
The images already communicate much of the subject’s appearance. Use the prompt to explain action, camera movement, and the progression toward the ending.
For compatible product images, an illustrative prompt could be:
Slowly move the camera forward as the bottle turns slightly toward the viewer. Keep its shape and label placement consistent. Ease the movement near the end, settling into the composition shown in the final image.
This is a suggested creative brief, not a tested result or a guarantee of label preservation. Its value is specificity: one camera movement, one subject action, and a defined finish.
Leave Room for the Final Composition
An ending needs enough visual breathing room to register. A transition that reaches its destination only at the final instant may feel unfinished, even when its individual frames look attractive.
Use simple timing language such as “begin gently,” “continue through the middle,” and “ease into the final composition.” These are directions for the generated motion, not exact timeline controls.
If a sequence contains several reveals or major transformations, consider simplifying the shot. Two endpoint images do not describe every intermediate story beat, and a short clip gives those beats limited room.
Put the Prepared Frames Into the Tool
Once the visual relationship is clear, a tool such as the first and last frame ai video generator provides a place to turn the opening image, ending image, and motion brief into a generated sequence.
The page’s current code configures a two-keyframe workflow with separate image slots. Its preset selects Veo 3.1 Lite, an eight-second duration, and a 16:9 aspect ratio. These are page defaults, rather than a complete list of supported settings or universal limits.
Upload the two frames in their intended order and describe the movement between them. Check the available settings and displayed credit cost before generating; the options depend on the selected model.
Review the Middle as Carefully as the Endpoints
A convincing opening and ending can hide problems in the transition. Watch the entire clip at normal speed, then inspect moments where the subject turns, overlaps another object, or changes scale.
Useful checks include:
- Does the main subject retain a consistent shape?
- Do faces and hands remain plausible during movement?
- Do product labels or fine edges distort?
- Does the camera follow a readable path?
- Does the ending arrive smoothly, without an abrupt jump?
Compare variations by the coherence of the complete shot. A dramatic moment is less useful when the surrounding movement breaks the scene’s continuity.
Understand What the Two Frames Cannot Specify
A first and last frame AI video generator creates an interpretation of the journey between images. The last frame guides the destination; it does not guarantee an exact pixel match.
The two images also leave information unstated. They may not show an object’s hidden surfaces, explain how a hand moves behind a body, or define the precise route through a changing environment. Those gaps matter when reviewing the generated result.
If an approved logo, exact product geometry, or precise final layout must remain intact, inspect it directly and plan any necessary finishing work. Prompt instructions alone do not verify accuracy.
Before generating, confirm that the subject is recognizable, the changes are intentional, and the proposed movement connects the compositions. After generating, judge the entire transition against that brief.
The strongest use of a first and last frame AI video generator begins with a clear visual relationship. Two carefully chosen frames establish the story’s boundaries; a focused motion brief gives the space between them a direction.