Remodeling a bathroom or kitchen in Knoxville is as much about understanding the pipes behind the walls as it is about tile and fixtures. Whether your home sits on a crawlspace or a slab, existing drain, vent, and water supply lines will shape where new fixtures can go, how far they can move, and what needs upgrading. Before ordering a freestanding tub or planning a multi-head shower, review wet walls, vent paths through the roof, pipe materials, and water heater capacity. The more your design cooperates with the system you already have, the fewer surprises you will face when floors are opened and walls come down.
-
Locate wet walls, stacks, and vents before choosing new fixture positions.
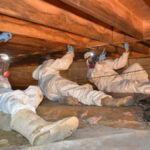
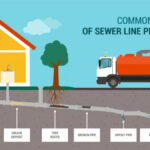
Start by mapping the wet walls that currently carry supply lines, the vertical drain stack that ties into your sewer line, and the vent pipes that rise through the roof. Look for a cleanout in the crawlspace or mechanical room and trace where that stack runs. In kitchens and baths, remove toe kicks or open a small drywall panel to see branch lines and joist directions. Knowing where joists, subfloor penetrations, and the main stack sit will show you which moves are realistic, like sliding a vanity a few feet, and which are tougher, like shifting a toilet across joist bays.
When your sketch reaches the point where a 3-inch toilet line must tie back into a stack, or a sink needs a proper vent path, double-check the plan. A licensed plumber can camera-inspect drains, confirm vent connections, and verify tie-ins using long sweep fittings instead of tight 90s that clog. Local firms list what they handle on sites such as www.whizproplumber.com, which can help you decide when professional help makes sense during the layout stage.
-
Pipe materials dictate how you reroute supply and drain lines.
What your pipes are made of affects both effort and method. Galvanized steel often means mineral buildup and low flow, so a remodel is a good time to repipe sections with copper or PEX. Where copper meets galvanized, a dielectric union prevents corrosion.PEX’s flexibility and crimp or expansion rings can simplify supply-line reroutes through tight stud bays, while CPVC requires careful solvent welds and support to avoid stress cracks. For drain lines, schedule 40 PVC is typical in many homes and adapts well to long sweep wyes and 45s for smooth flow.
Consider a kitchen island sink on a slab. PEX supplies can snake under cabinets with fewer joints, but moving the 2-inch drain requires trenching concrete, reestablishing the vapor barrier, and patching the slab to a consistent thickness. In contrast, the same move over a crawlspace might only need careful drilling through rim joists, adding a cleanout, and hanging the new PVC drain with proper slope back to the main line. The foundation type heavily shapes the complexity and the mess.
-
Drain slope, trap arms, and venting set movement limits.
Waste lines require a steady downhill pitch to carry solids. Plumbers commonly aim for about a quarter inch of fall per foot on smaller drains to prevent standing water or scouring. The length of an unvented trap arm matters too: run a lavatory too far without a proper vent,t and you risk siphoning the P-trap, which creates odors. Where a direct vent back to a stack is impossible, code may allow an air admittance valve, but placement and accessibility rules still apply. A common mistake is using a short-radius 90 on a horizontal drain or creating an S-trap by dropping too fast from the trap. Both can lead to clogs and gurgling.
Picture relocating a toilet four feet. In a crawlspace, you might open the subfloor near the closet flange, run a new 3-inch line with long sweep fittings, and reconnect with a wye to the existing stack, then strap the pipe between joists to maintain pitch. On a slab, that same move means breaking concrete, rerouting around rebar, and resetting the flange at finished floor height. One trade-off some homeowners consider is a macerating toilet or upflush system that pumps to a nearby stack. It can avoid trenching, but it introduces a motorized component that needs maintenance and power, and it must be approved for use and vented per local rules.
-
Pressure, flow, and hot water when adding showers or tubs
Upgrades that boost water demand need more than elegant hardware. Check static pressure at a hose bib; if it is high, a pressure-reducing valve may need adjustment or replacement to protect fixtures. A 3/4-inch trunk line that necks down to 1/2-inch branches might not feed a soaking tub quickly, and long, undersized runs can starve a rain head and handheld used at the same time. Verify your water heater’s capacity and recovery rate, and look for an expansion tank if a PRV or backflow device creates a closed system. Modern thermostatic mixing valves help maintain stable temperatures when multiple fixtures open at once.
Adding a walk-in shower with two outlets highlights the interplay of flow and drainage. Supply may call for upsizing or balancing branch lengths to reduce pressure drop when both heads run. On the waste side, a shower pan commonly uses a 2-inch drain for faster evacuation, and the weep holes in the drain assembly must stay clear so the mortar bed doesn’t trap moisture. Oversights here show up later as slow drains, temperature swings, or a pan that smells musty because water never fully leaves the assembly.
Permits, shutoffs, and phasing a livable remodel
Moving drain lines, rerouting vents, replacing a water heater, or adding a new bathroom typically requires permits and inspections. In practice, this protects you by verifying slope, venting, and support before you close walls. A smart phasing plan keeps water on in part of the home: install temporary caps on new stubs, add quarter-turn angle stops at each fixture, and label every new shutoff so you can isolate a branch without killing the main. If the main shutoff or curb stop is unreliable, replace it early to avoid whole-house outages at the worst moment.
Once rough-in and finish work are done, take a few practical aftercare steps. Photograph open walls before they close so future repairs can find manifolds, trap arms, and concealed cleanouts. Flush lines to purge solder beads or PVC shavings, then rinse aerators and shower screens so debris does not clog fine spray jets. Test every valve and drain under normal use for a few days, then recheck accessible joints. If you add a deck-mounted tub filler or concealed shower valve, leave an access panel where possible for future service.
A successful plumbing remodel in Knoxville starts with the system you already have. Trace wet walls and vents, note pipe materials, and measure realistic distances before committing to a layout on paper. Accepting limits set by slope, venting, and pressure often leads to smarter choices, such as shifting a vanity instead of trenching a slab for a toilet, or upsizing a trunk line before splurging on a bigger shower head. With a clear plan, permits in place, and thoughtful phasing, you can upgrade comfort and function without creating hidden problems for the next owner or your future self.