A towel warmer is usually installed near the end of a bathroom project, but most of its important decisions happen much earlier. The wall needs a location, the installer needs product information, and the finish layout needs to account for brackets, controls, and the towel itself.
Treating the product as part of the wall plan keeps those decisions visible. It also gives the homeowner time to compare hardwired and plug-in configurations where available, review the mounting surface, and ask how the selected model should be operated and maintained.
A wall-mounted towel warmer planned as part of the finished bathroom wall.
Follow a workable project sequence
A practical sequence is to select the model, confirm the drawing, mark the wall location, coordinate electrical work and backing, and then finalize the tile or stone layout. The order matters because each decision affects the next one. Waiting until the room is nearly complete leaves fewer good locations and can force visible compromises. In practical terms, this is what it means to follow a workable project sequence.
Before installation, compare the delivered product and its current instructions with the approved plan. Model revisions, finish choices, or site measurements can change during a project. A final check catches those differences before holes are drilled. The installer should also confirm how the controls will be reached and how towels will clear nearby fixtures. A buyer comparing towel warmer installation guide options can use these details to remove unsuitable choices before discussing style. A useful choice is one that still makes sense after the first impression has worn off. That is the practical reason to follow a workable project sequence.
Test the full towel location
Start with the wall elevation and an actual bath towel. Check the available width, the hanging length, the nearest switch, the door swing, and the route people take between the shower and vanity. Product dimensions alone do not show whether a towel will brush the floor or crowd a walkway. A quick full-scale tape outline often reveals problems that are hard to see on a small plan. In practical terms, this is what it means to test the full towel location.
The mounting surface matters as well. A wall-mounted unit needs suitable support and a location that works with the finished tile or stone layout. These decisions are easier while the wall is open and the electrical plan can still change. Once the finish is installed, even a small adjustment may involve several trades and leave an awkward patch. When the decision involves bathroom planning, these checks connect the design to a product that works in daily use. This is where measurements and everyday habits deserve equal weight. That is the practical reason to test the full towel location.
For supporting product information, review bathroom planning guide for towel warmers. Confirm the current model details before ordering or installation.
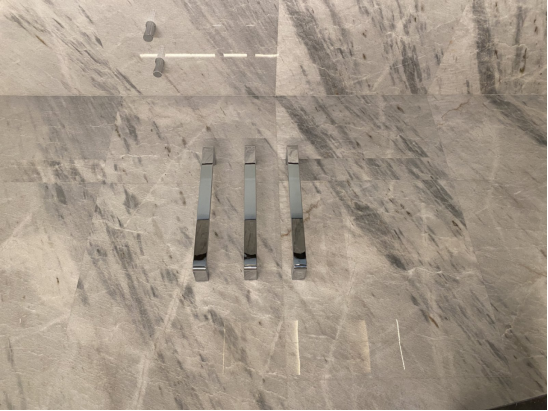
Metal finish, stone, and bathroom lighting need to be considered together.
Coordinate the electrical details
The electrical route should be settled before tile or stone closes the wall. A hardwired installation needs a planned connection point. A plug-in unit needs a suitable receptacle and a cord route that does not create an awkward visual line or interfere with wet areas. Exact requirements vary by product and location, so the installer must check the current instructions and local rules. In practical terms, this is what it means to coordinate the electrical details.
Wall support belongs in the same conversation. Mounting points should land on a structure that can carry the unit in regular use, including the pull of wet towels. Coordinating power, backing, and finish layout in one drawing makes the installation easier to understand. It also reduces the chance that one trade solves its part while creating a problem for another. Homeowners researching hardwired towel warmer can use these details to keep the bathroom decision practical. It is easier to correct a drawing now than to move a fixture after the wall is finished. That is the practical reason to coordinate the electrical details.
Before sign-off, print the wall elevation and place the current product drawing beside it. Add the towel length, control location, and the nearest door, cabinet, or glass panel. Someone who has not followed every design meeting should still be able to see how the product fits. That review is useful when comparing towel warmer installation guide because it turns the final choice into a checkable plan. If the drawing is unclear to a fresh pair of eyes, the installation note needs more detail.
A practical conclusion
Good bathroom planning is mostly about timing. Select the product before final finishes, verify the current drawing and instructions, and let the installer confirm the site conditions. The finished result should look simple because the complicated questions were answered earlier.
The official P&Bhusri resources provide additional brand, collection, or project context for the next stage of comparison.
Frequently asked questions
When should a towel warmer be selected?
Choose it while the wall and electrical plans can still be changed. The project team needs time to confirm dimensions, mounting support, power, clearances, finish, and towel reach. Late selection can reduce the available locations and complicate finished surfaces. Check that answer against the actual room before trying to follow a workable project sequence.
Is hardwired better than plug-in?
The better connection is the one that fits the product, project stage, and electrical layout. Hardwiring often gives a cleaner appearance and needs construction planning. Plug-in installation may be easier when a suitable receptacle already exists. Confirm the available version before purchase. Keep the answer tied to the selected towel warmer installation guide when you test the full towel location.
Where is the best place for a towel warmer?
A good location is reachable from the shower or tub, clear of doors and walkways, and compatible with the product’s installation requirements. The towel should not touch the floor or block a switch. The installer must also review wet-area and electrical considerations. Use the current model instructions as you coordinate the electrical details, especially when a detail changes with product configuration.