Many homeowners try to tame drafty rooms and high utility bills by piling more insulation into the attic. Extra inches of blown-in cellulose or fiberglass batts can help, but only if the ceiling plane is reasonably airtight first. Warm and humid indoor air escapes through cracks around light fixtures, plumbing stacks, and the attic hatch, then flows through the insulation. That air movement undermines the stated R value, delivers moisture to the roof deck, and leaves comfort problems unchanged. This article explains where typical leaks hide, why they reduce insulation performance, and a practical sequence for sealing them before you add depth. You will also see material trade-offs and simple aftercare checks that keep the upgrade working.
The Overlooked Leak Paths Above Your Ceiling
The most common bypasses sit where you rarely look: gaps along top plates of interior walls, the cutouts for recessed can lights, open chases around plumbing vents, and hairline cracks where drywall meets a masonry chimney. Attic hatches and pull-down ladders often lack weatherstripping, and thin panels radiate heat. Around duct boots, you may find unsealed joints where sheet metal meets drywall. At the eaves, wind can sweep through soffit vents and rush directly across the top of loose-fill insulation if baffles are missing, a problem called wind washing that strips away heat before it can be retained.
Consider a hallway ceiling with five non-IC-rated recessed lights and an unsealed bath fan box. In winter, buoyant indoor air rises through those fixtures, pulling conditioned air out of rooms and dragging attic air back through other cracks to replace it. The stack effect accelerates leakage on cold, windy days. Building performance contractors, including First Defense Insulation, routinely address these specific points because even a few square inches of total gap area can nullify inches of new insulation. Sealing the lid first stops the conveyor belt of air that otherwise makes insulation behave like a filter instead of a blanket.
How Leaks Undercut Insulation Performance
Insulation slows heat flow by conduction, which is what R-value measures. Air leaks introduce convection, a separate heat transfer mode, through and around the insulation. Air that slips through a can light or wiring hole warms the fibers and sets up convective loops, so parts of the layer run hot and others cold. At the eaves, fast-moving outside air creates wind washing that reduces effective R value near the edges unless baffles and dams are installed. Moisture adds a second penalty. Exfiltrating indoor air carries water vapor; when it reaches cold roof sheathing, the vapor can condense, dampening the insulation and further degrading R value. In cold regions, it can feed ice dams; in humid summers, it can leave darkened sheathing and musty odors.
Correcting the Problem: A Practical Sequence That Works
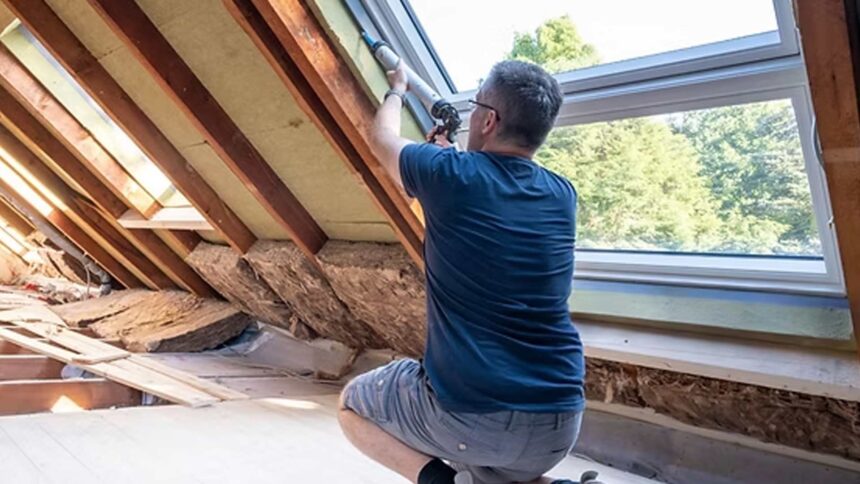
Start with access and a plan. Move stored items, lay temporary planks across joists, and mark hazards. Map penetrations by shining a light from below around bath fans, recessed lights, and electrical boxes; the beams show up easily in the attic. Seal small gaps and top plate cracks with acrylic latex or polyurethane caulk. Use one-part expanding foam at larger wiring and plumbing penetrations, and foil-faced rigid foam plus foam or sealant to cap open chases. Around metal flues and chimneys, install sheet metal flashing and fire-rated sealant, not foam. Replace non-IC-rated recessed fixtures, or cover them with code-listed enclosures, before burying them in insulation. Weatherstrip and latch the attic hatch, and build a rigid insulation dam around it to prevent loose fill material from spilling.
Picking Materials: Cellulose, Fiberglass, and Spray Foam Trade-Offs
Once the lid is tight, choose how to reach your target R value. Blown-in cellulose fills irregular bays, resists air movement better than loose fiberglass, and can be topped up easily later, but it must stay dry and at full depth with installed ruler markers. Fiberglass batts are familiar and affordable, yet they require precise cutting around joists and boxes; compressing a batt lowers its R value because thickness is part of the rating. Dense pack fiberglass and mineral wool reduce wind washing but still need proper air sealing underneath. Closed-cell spray foam both insulates and air-seals in one layer and is often chosen when ducts and air handlers live in the attic; by foaming the roof deck and creating an unvented attic, you bring the HVAC into conditioned space. The trade-off is cost and reduced access to roof framing for future wiring or repairs, and you must verify compatibility with roofing and ventilation.
After the Upgrade: Ventilation, Moisture, and Small Checks That Pay Off
A sealed, well-insulated attic still relies on proper ventilation and moisture control. Keep soffit vents clear with baffles and ensure a path to the ridge vent; blocking intakes with insulation defeats the system and encourages condensation. Verify that bath and kitchen exhaust ducts terminate outdoors, not into the attic or a soffit cavity. Air-seal and insulate the attic ladder cover or hatch lid, and check the weatherstripping for compression marks. Look a couple of times a year for telltales like frosty nails in winter, damp insulation, or rust on roofing nails, which indicate lingering air leaks. If feasible, a blower door test before and after the work quantifies leakage reduction and helps prioritize any remaining bypasses in knee walls, dropped soffits, and behind tubs or fireplaces.
Adding depth without sealing is like wearing a heavy coat with the zipper open. A few targeted steps at the ceiling plane transform how insulation performs: block the big chases, seal the top plates, enclose or replace leaky fixtures, protect soffit intakes with baffles, and then install the right material to full, even depth. In some homes, that is dense blown cellulose on the attic floor; in others, especially with ducts above the ceiling, it may be a foam-insulated roof deck that brings those components inside the thermal boundary. Either approach works better when air can no longer shortcut through your ceiling. Prioritize tightness first, then R value, and your comfort and energy use will follow.