Having a refrigerator with a water dispenser makes everyday life more convenient by providing easy access to fresh, chilled water. Depending on the model, the water dispenser in some refrigerators may require a water line connection. If it does, it is crucial to ensure a proper connection for efficient performance.
In this blog, you will discover easy steps to connect a water line, along with a few useful tips to make the job go more smoothly.
Steps to Connect a Water Line to Your Refrigerator
Connecting a refrigerator water line is easier than it may seem. Taking one step at a time helps make the process simple and organized. Keeping the owner’s manual nearby can also be helpful because connection points and installation details may vary slightly from one refrigerator model to another.
1. Gather the Required Tools and Refrigerator Parts
First, gather all the refrigerator parts required to begin the installation process. This will make the job easier and faster. Items typically used include a water supply line, adjustable wrench, tee adapter valve, sealing tape, towels, and a bucket.
Additionally, make sure the tubing, fittings, and connectors match your refrigerator model. Using the correct components helps create a secure connection and lowers the chance of leaks later.
2. Turn Off the Water Supply and Prepare the Area
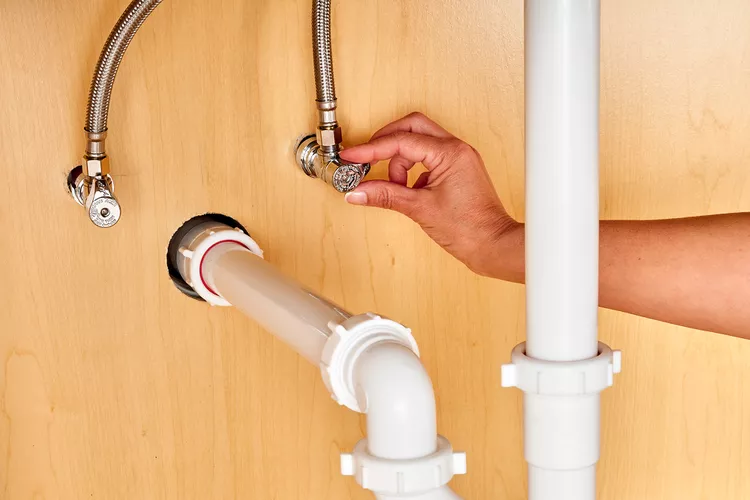
Before disconnecting any plumbing fixture, make sure the nearby cold-water valve is turned off. Opening a nearby faucet briefly can also help release any remaining pressure in the water line.
Put some towels or even a bucket beneath the working area to catch any dripping water. Also move the refrigerator a little away from the wall to have enough room to work without restricting any movements.
3. Choose the Right Water Supply Connection
Many refrigerators are connected to the cold water supply under the sink using a T-adapter. In some houses, there may already be a water supply line behind the refrigerator that makes the process easier.
For example, choosing the shortest suitable path for the water line can help maintain good water flow. Keeping the tubing away from sharp edges and electrical wires also helps protect it over time.
4. Route the Water Line to the Refrigerator
Carefully run the water line from the water source to the back of the refrigerator. Try to keep the tubing smooth instead of making sharp bends, as this helps water flow freely.
Furthermore, leave a little extra tubing behind the refrigerator. Extra length makes it easier to pull the appliance forward later for cleaning or maintenance without putting stress on the water line.
5. Connect the Water Line Securely
Now you need to secure the water lines. You can do this by attaching one end of the tubing to the water supply valve and the other end to the refrigerator’s water inlet. Tighten each connection carefully based on the connector type until it feels secure.
A firm connection is usually enough to create a proper seal while preserving the fittings. Tightening with excess force is not advisable, since it can damage the connections.
6. Turn On the Water and Check for Leaks
Slowly turn the water supply back on after all the connections are complete. Let the water flow gradually and check every connection for any leakage.
Similarly, look closely for any small drips or moisture around the fittings. If a leak appears, tightening the connection slightly is often enough to stop it.
7. Flush the System and Test Water Flow
A new water line may contain a little air, and a new water filter may release small carbon particles. Once the line is connected, run water through the dispenser as recommended by the manufacturer to flush the system before first use.
After that, test the water dispenser to make sure the flow is steady and smooth. A steady water flow and ice production indicate that the connection is working properly.
Common Mistakes to Avoid During Installation
A few simple precautions can help the installation go more smoothly.
- Forgetting to turn off the water supply before starting.
- Using the wrong tubing or fittings for the refrigerator.
- Bending the water line too sharply.
- Tightening connectors more than necessary.
- Skipping the step of flushing the new water line.
- Pushing the refrigerator too close to the wall and pinching the tubing.
- Not checking the connections carefully for leaks.
Conclusion
Connecting a water line to the refrigerator may seem complicated at first, but once you break it down into small steps, it will be quick and easy. Using the right tools, making sure all connections are secure, and checking for possible leaks can help ensure a steady water supply for both the ice maker and water dispenser.
Checking your water line and connections regularly can also help maintain steady performance.
References
https://www.beko.com/en-en/Blog/how-tos/how-to-connect-the-water-line-to-your-fridge
https://theappliancepros.ca/blog/how-to-install-refrigerator-water-line/