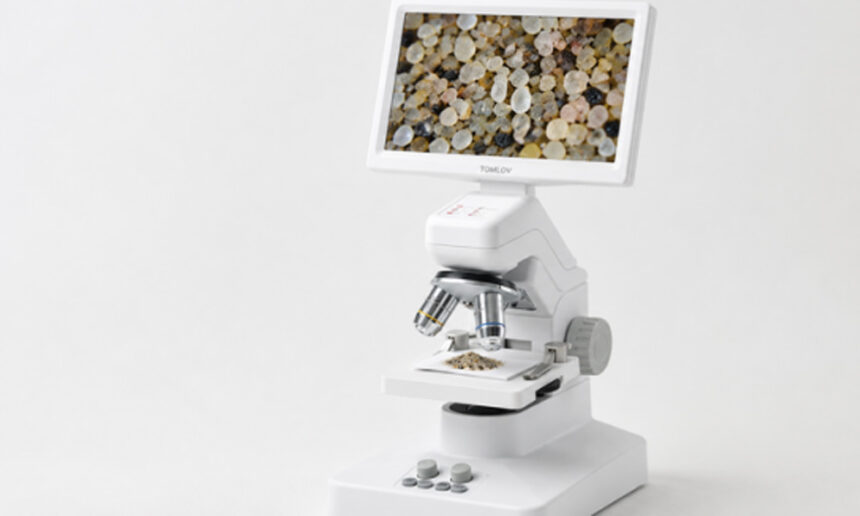
Sand looks simple in your hand, but under a microscope it becomes a mix of shapes, colors, textures, and tiny fragments. Some grains look smooth and frosted, while others look sharp, glassy, dark, or shell-like. A small sample can show rounded particles, broken rock fragments, clear grains, coral bits, and natural debris.
For beginners, sand is one of the easiest dry samples to observe. You do not need staining or cutting. You only need a dry sample, a clean background, adjustable lighting, and a careful viewing process.
What Can You See in Sand Under a Digital Microscope?
Smooth, Rounded, or Frosted Grains
Some sand grains look smooth and rounded because they have been moved by wind, waves, or water over time. These grains may look like tiny pebbles with softened edges. Others may appear frosted or cloudy, especially when their surfaces have been scratched or weathered.
Jagged, Sharp, and Broken Fragments
Not every sand grain is rounded. Some particles look jagged, sharp, or freshly broken. These pieces may come from rock fragments, shell pieces, or other materials that have not been worn smooth yet. Under magnification, they can look more like crushed stone than beach sand.
Shell Pieces, Coral Bits, and Natural Debris
Beach sand may include tiny shell pieces, coral-like fragments, and other natural debris. These particles can look curved, layered, ribbed, white, pink, or slightly translucent. They are often more irregular than mineral-like grains, which makes them easier for beginners to notice.
What Type of Sand Should You Observe First?
Beach Sand for Varied Particles
Beach sand is usually the most interesting starting point because it often contains many particle types in one sample. You may see clear grains, dark specks, shell fragments, rounded particles, and sharp pieces. A small spoonful is enough for a full observation session.
Garden Sand or Play Sand for Comparison
Garden sand and play sand are useful for comparison. They may look more uniform than beach sand, depending on how they were processed. Comparing them with beach sand helps you notice differences in color, particle size, edge shape, and the amount of natural debris.
Dry Samples That Are Easy to Handle
Dry sand is easier to view than wet sand. Wet grains clump together, stick to tools, and reflect light unevenly. If the sample is damp, spread a small amount on paper and let it dry before placing it under the microscope.
What Do You Need Before You Start?
A Digital Microscope With Adjustable Lighting
Sand grains can reflect light strongly, so adjustable lighting matters. Too much light can wash out clear grains, while too little light hides darker particles. A digital microscope for specimen observation can help beginners view sand on a screen, adjust lighting, and save close-up photos for comparison.
A Plain Background for Contrast
Use a simple white, black, or dark background. White paper works well for dark grains, while black paper can make clear, pale, or shell-like particles stand out. Avoid patterned surfaces because they make it harder to separate the sand from the background.
Tweezers, Paper, and Small Containers
You do not need many tools. Tweezers, folded paper, small containers, and labels are enough. Keep different sand samples separate and label them by source, such as beach, garden, or play sand. This makes later comparison easier and more meaningful.
How Should You Prepare Sand for Microscope Viewing?
Dry the Sand Before Observing
Make sure the sand is dry before observation. Damp grains stick together and hide their individual shapes. Spread a small amount on paper and wait until it dries naturally. Once dry, gently break apart any clumps before viewing.
Spread Only a Few Grains at a Time
Use only a few grains at once. A crowded pile makes it hard to see edges, texture, and color differences. Start with a small scatter of grains, leaving space between particles so you can study each one clearly.
Keep Samples From Different Places Separate
Do not mix samples from different places. Beach sand, garden sand, and play sand may look different under magnification. Keeping them separate allows you to compare grain shape, color, shell content, and surface texture more accurately.
How Do You View Sand Grains Clearly?
Start With Low Magnification
Begin with low magnification so you can see several grains at once. This helps you find interesting particles before zooming in. Starting too high can make the view confusing because you may only see part of one grain without context.
Adjust Top Lighting to Reduce Glare
Top lighting works well for dry sand, but it needs adjustment. Clear or shiny grains may reflect too much light. If the image looks flat or washed out, lower the brightness or change the angle slightly before increasing magnification.
Move the Sample Slowly Across the View
Move the sample slowly and scan one area at a time. Look for grains that stand out because of shape, color, shine, or texture. Once you find an interesting particle, stop moving the sample, refocus, and capture a photo before continuing.
How Can You Compare Different Sand Samples?
Use the Same Magnification Each Time
When comparing samples, keep the magnification consistent. If one sample is photographed close up and another from farther away, the comparison can be misleading. Use the same setting for your main comparison images, then take extra close-ups if needed.
Keep Lighting and Background Consistent
Lighting and background can change how sand appears. A grain may look clear on a dark background but nearly invisible on white paper. For fair comparison, use the same background and similar lighting for each sample.
Take Photos for Side-by-Side Comparison
Photos make sand observation easier to review later. Capture one wider image of each sample and a few close-ups of unusual grains. For documenting small details, a TOMLOV DM301 Pro digital microscope can help save photos or videos of color, surface texture, edges, and shape differences.
What Should Beginners Avoid Overinterpreting?
Do Not Identify Minerals From Appearance Alone
Sand grains may look like quartz, mica, shell, or dark mineral particles, but appearance alone is not enough for reliable identification. A microscope can show color, shape, transparency, shine, and texture, but it cannot confirm the exact mineral composition.
Use Observations as Visual Clues, Not Lab Results
Microscope images are useful for learning, comparison, and visual curiosity. They should not be used to judge beach safety, pollution, or exact sand origin. For beginners, the goal is to describe what you see: rounded, sharp, clear, dark, frosted, shell-like, or shiny.
Conclusion
Under a microscope, sand is not just a pile of tiny beige grains. It can include smooth particles, sharp fragments, frosted surfaces, clear grains, dark specks, shell pieces, and coral-like debris. To see these details clearly, keep the sample dry, spread only a few grains at a time, start with low magnification, adjust top lighting, and take photos for comparison.
FAQs
What Do 1,000,000 Grains of Sand Look Like?
One million grains of sand may look like a small handful or shallow pile, depending on grain size. Under a microscope, the number matters less than the variety. Even a tiny sample can show rounded grains, sharp fragments, shell pieces, clear particles, dark specks, and different surface textures.
What Does Sand Look Like Magnified 300 Times?
At 300× magnification, one sand grain may fill much of the view. You may see surface roughness, cloudy areas, tiny scratches, color differences, and edge shape. However, depth of field can become shallow, so it is better to start lower before zooming in.
Why Do Sand Grains Look Different Under a Microscope?
Sand grains look different because they come from different materials and have different histories. Some are worn smooth by waves or wind, while others are freshly broken and sharp. A sample may also contain shell fragments, rock particles, clear grains, or darker mineral-like pieces.
Can a Microscope Show What Sand Is Made Of?
A microscope can show visual clues such as color, shape, shine, transparency, and texture. It cannot confirm exact composition by appearance alone. For reliable mineral identification, additional tests may be needed. For beginner observation, it is better to describe the visible features carefully.
Do You Need to Put Sand on a Slide?
No. For basic observation, dry sand can be placed on plain paper, a dark background, or another flat surface. A slide can keep the area clean, but it is not required. The key is to spread out only a few grains so their edges and surfaces are visible.